The Cricut maker used in this project about how to etch a chef's knife was gifted to me by Cricut.
When it comes to fancy knives, I'm pretty much an expert. I like my knives sharp, well weighted and ready for action. But for this project, I'm going to show you how to turn a cheap (but sharp and good!) chef's knife into something amazing. It would make the perfect personalised father's day gift, or gift for any foodie in your life.
But I don't have a Cricut! Can I still etch a knife?
For this project you don't have to have one, in fact the first time I saw anything like this, there was NO CRICUT involved. But gee whizz, having a Cricut makes this project so much easier and makes the designs you can do on your knife so much better.
I have a Cricut Maker (gifted) and I use it for so many things! I also have an Explore Air 2, and it is amazing too. If you want to check out some of my other projects, you can see pantry labels here or how to personalise a kids party.

Is the knife still food-safe?
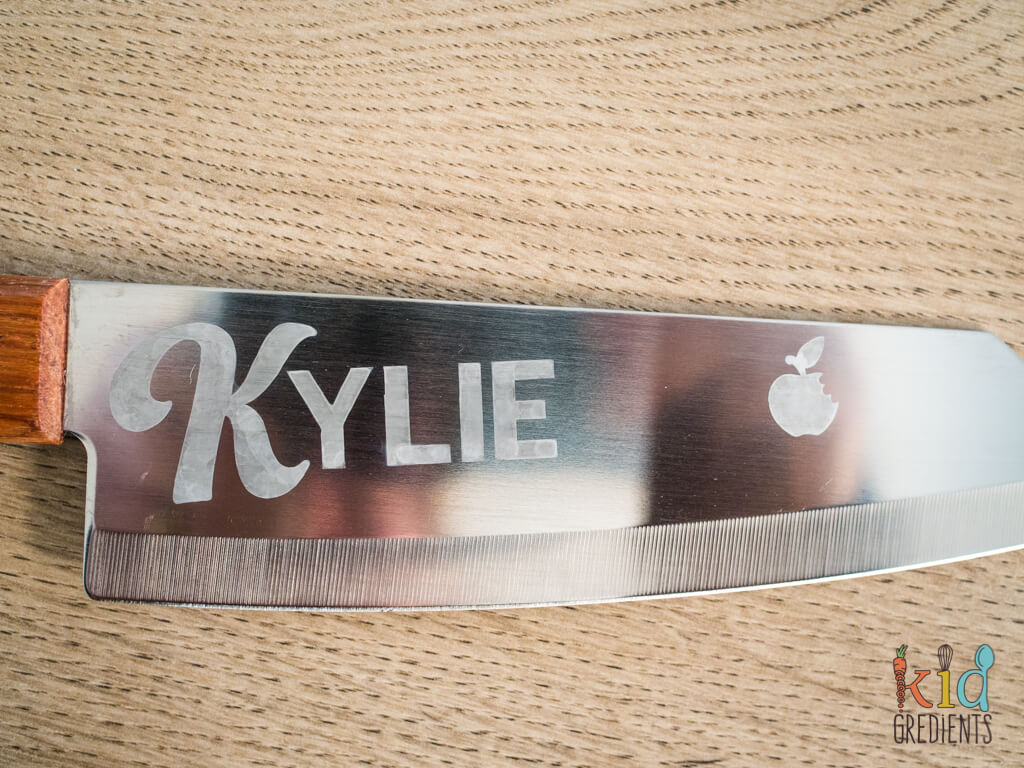
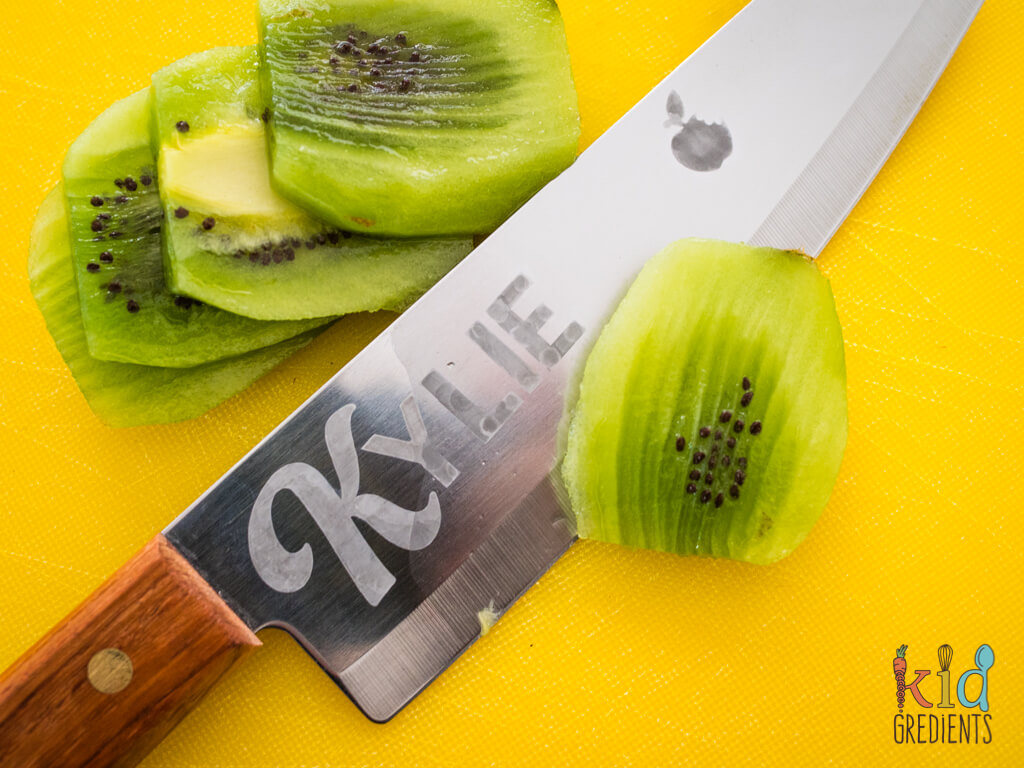
Yes! In fact this is a similar technique to commercial etching on stainless steel, like how they get the names of the actual knives onto the blade.
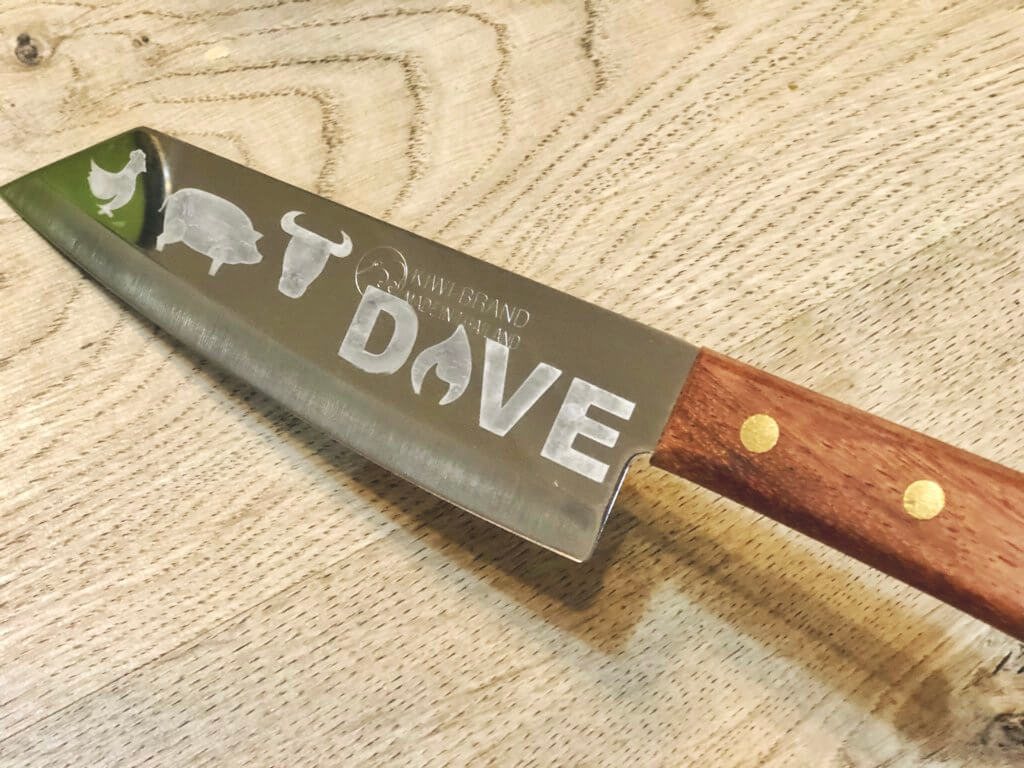
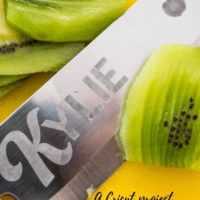
That's the first one we did! Hubby is into American style pitmaster bbq and has wanted a knife with his name on it for ages. So we gave it a go on his first.
Alright! I'm ready! What do I need?
Materials you are going to need are:
- a knife- stainless steel and for your first attempt get something cheap
- a design- I'll walk you through that in a minute.
- vinyl
- your standard mat
- a Cricut maker or explore air 2 (or a really steady hand!)
- duct tape
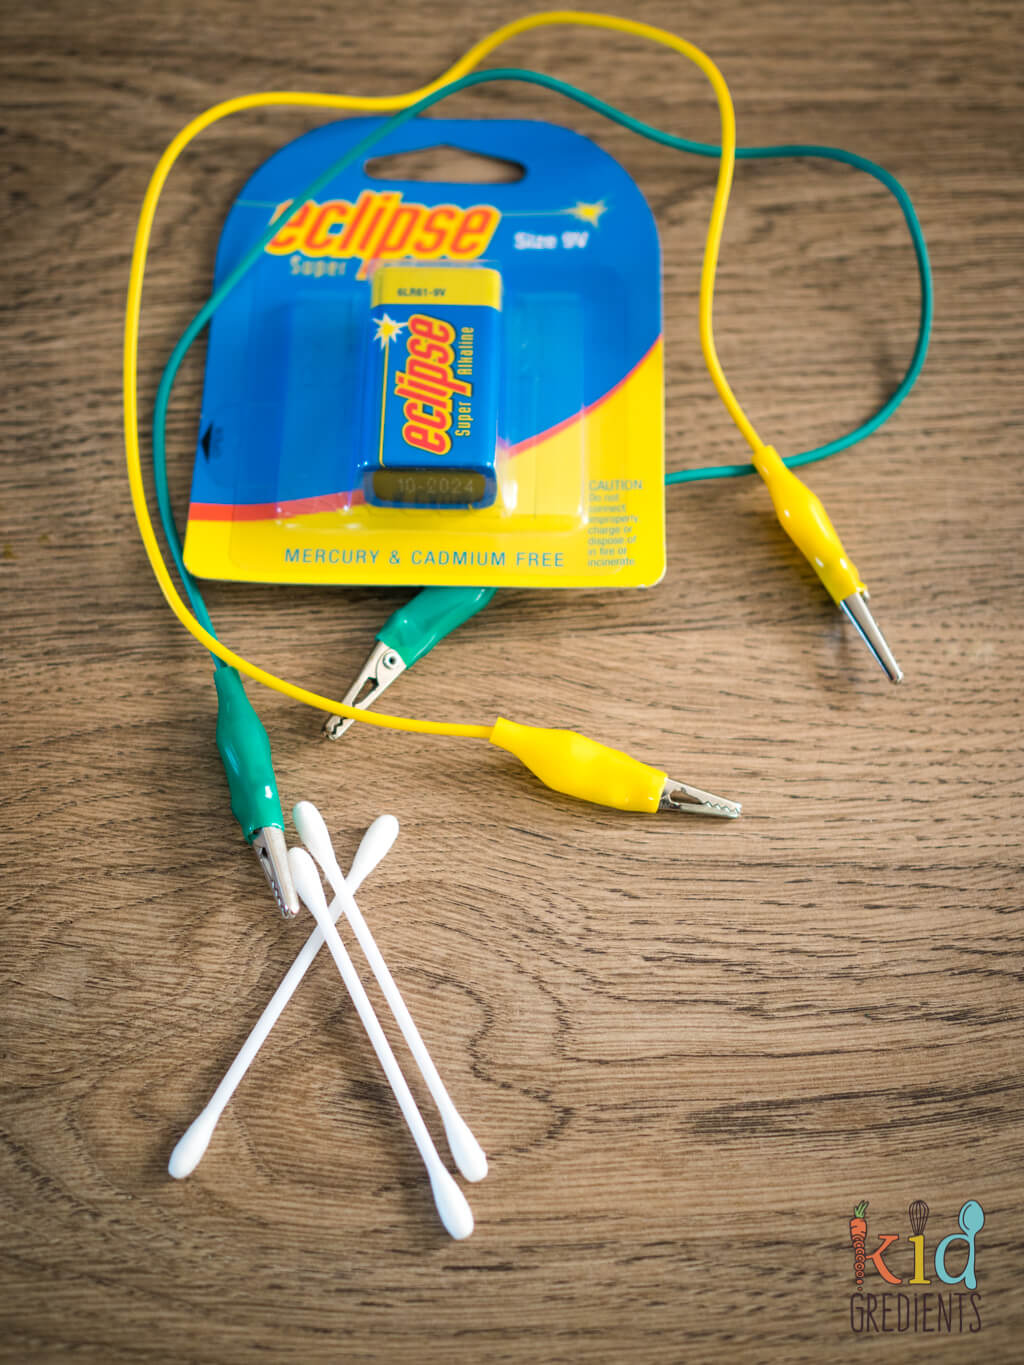
- a 9 volt battery
- leads with alligator clips
- a container
- salt water solution
- cotton tips
How do I make my design?
From experience, less detailed, more chunky designs work best. You have to be able to get the cottontip into all the bits that you want to etch, so fine mandalas aren't really the thing to do for this.
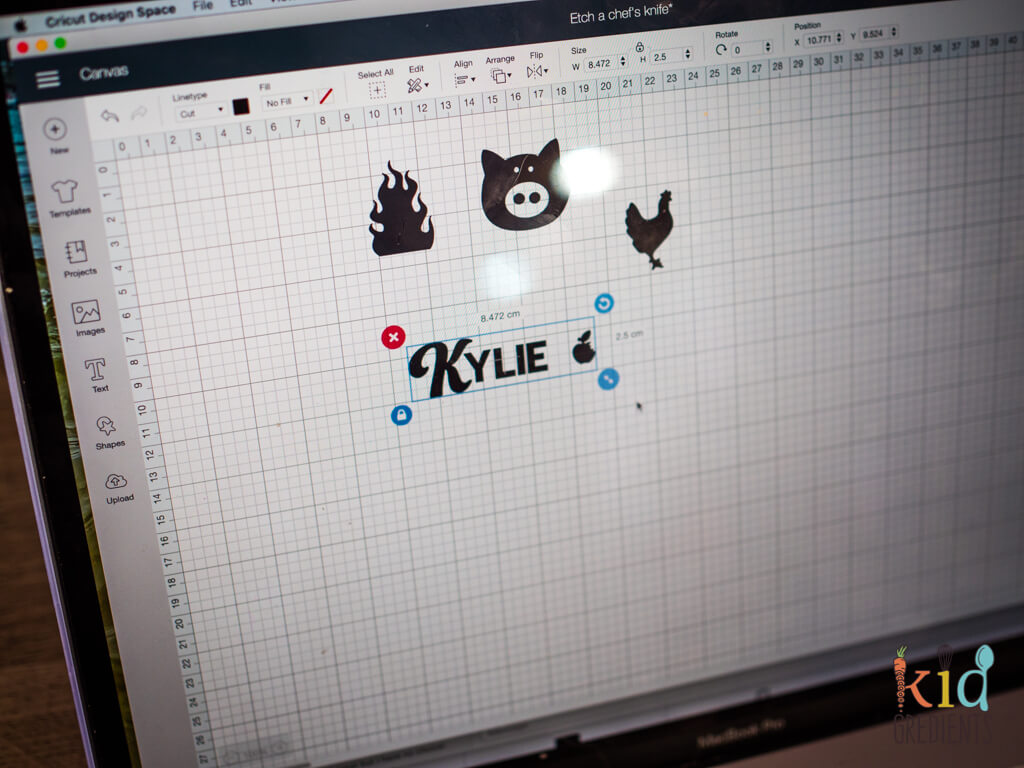
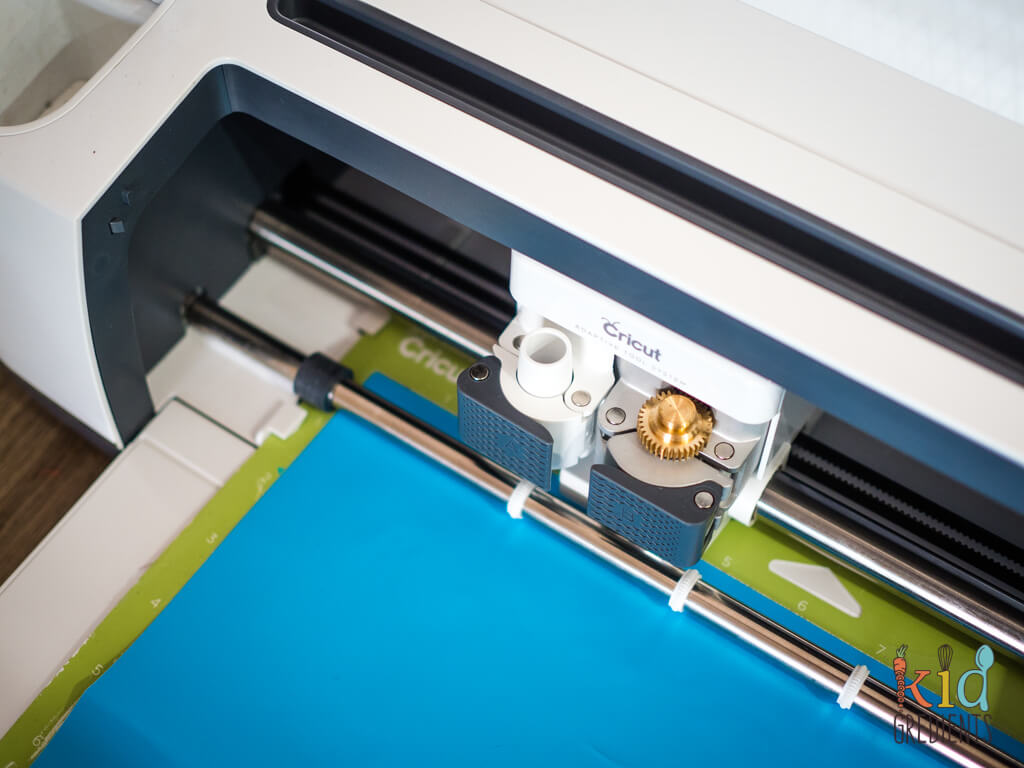
Lay it all out in Cricut design space (you can see my project here). And cut the vinyl. This doesn't have to be permanent vinyl, and any scraps will do, so long as it is big enough to cover most of the knife.
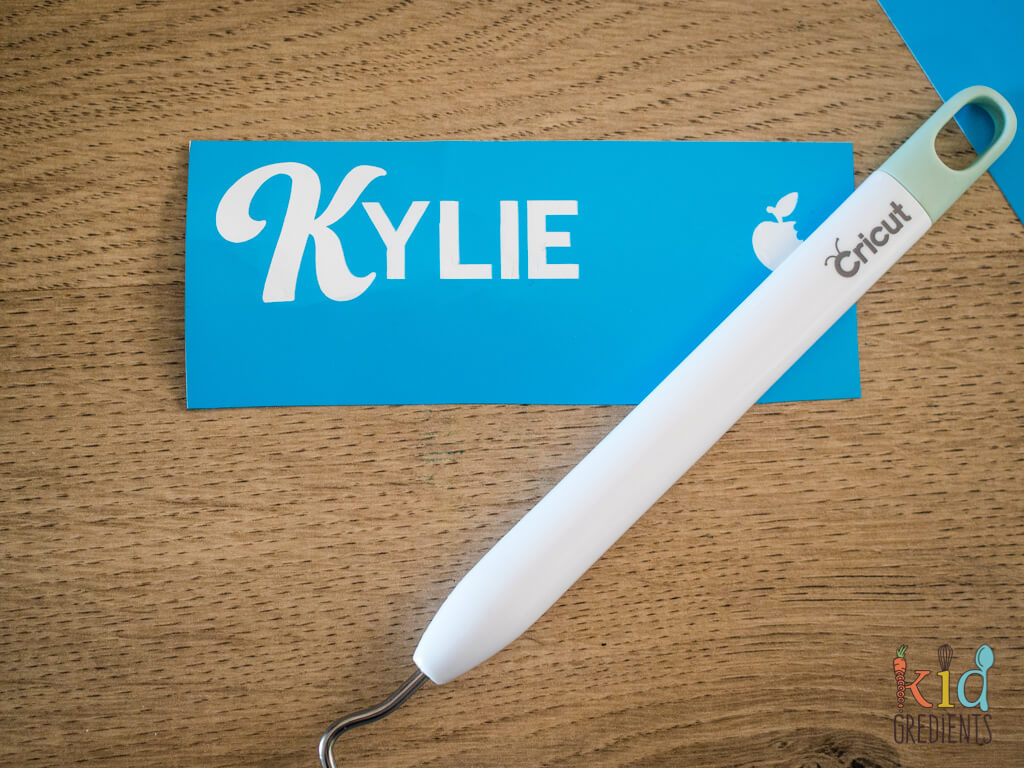
Don't weed like you normally would!
Let this be your warning! You are getting rid of the bits that you are normally trying to keep and instead you are keeping the background. The background is what protects the rest of the knife when you are etching.
Is this dangerous?
Well, you want to make sure that you do it in a well ventilated place and that no-one comes in and messes with your setup, but aside from that, it's all good.
Need more cricut ideas?
- Personalised kids parties with Cricut Explore Air 2
- DIY pretty pantry and spice labels with the Cricut Explore Air 2
How to etch a chef's knife
Equipment
Ingredients
- knife for etching stainless steel
- vinyl the size of the knife blade an offcut will do- doesn't have to be permanent vinyl
- duct tape
- cotton tips
- salt water solution ½ teaspoon salt per 1 tablespoon water
Instructions
- Make your design in design space.
[mv_img id="16401"]
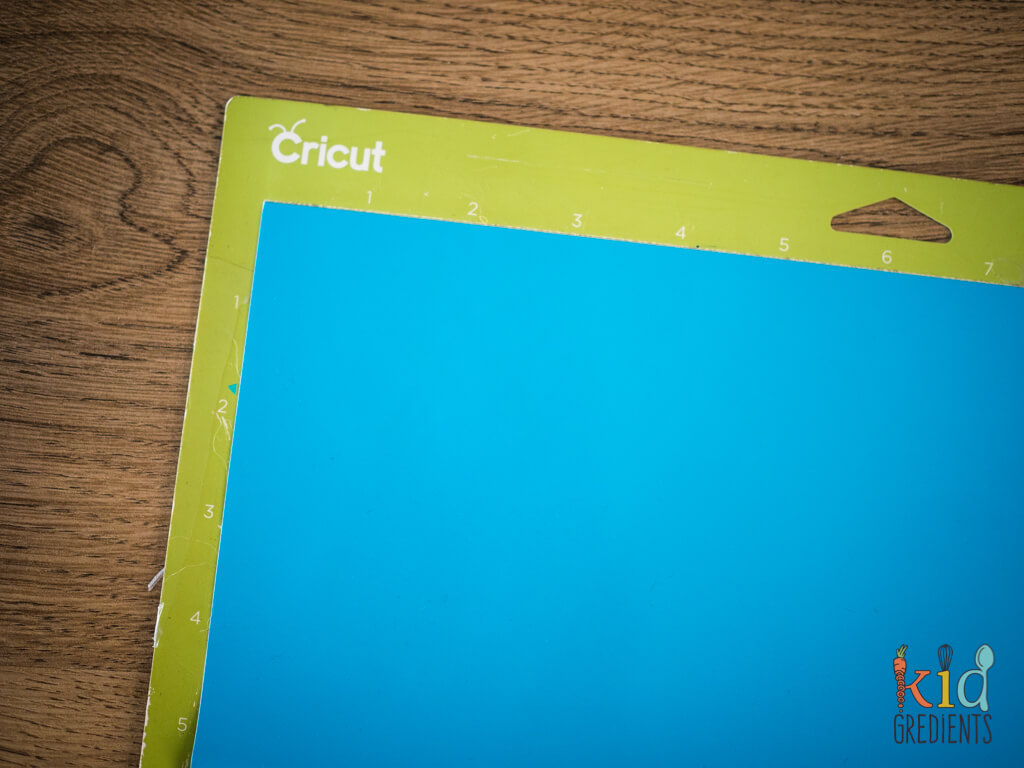
- Cut your vinyl using your standard Mat on your Cricut Maker.
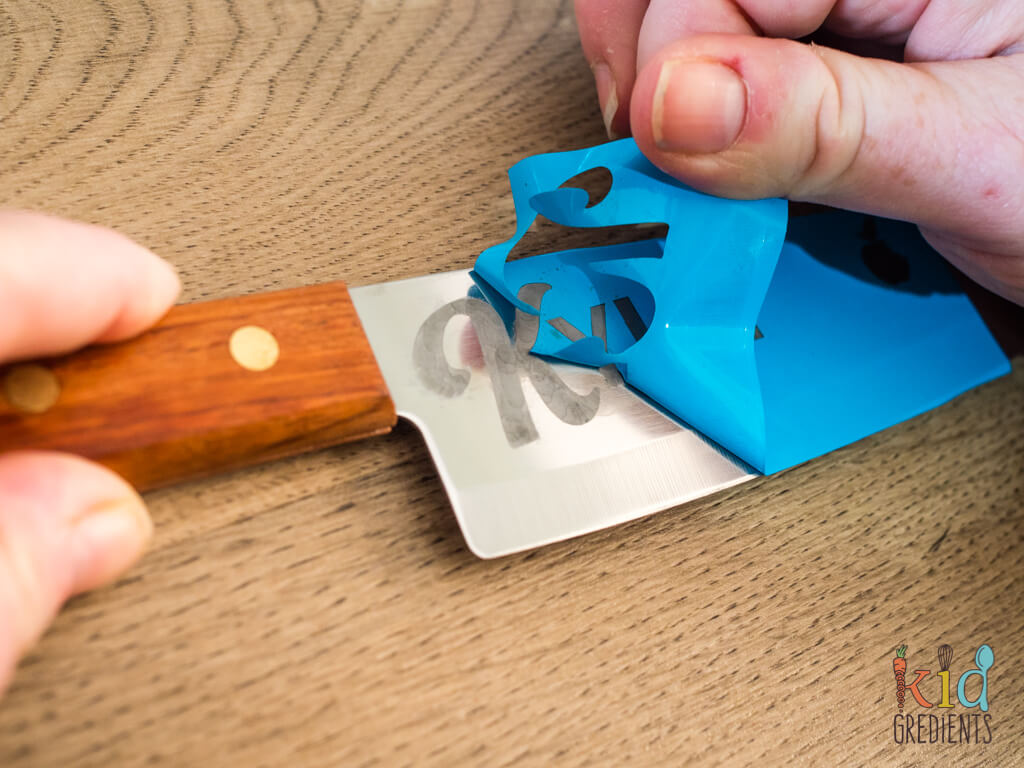
[mv_img id="16404"] - Weed out the design elements using your weeding tool, and leave the background intact.
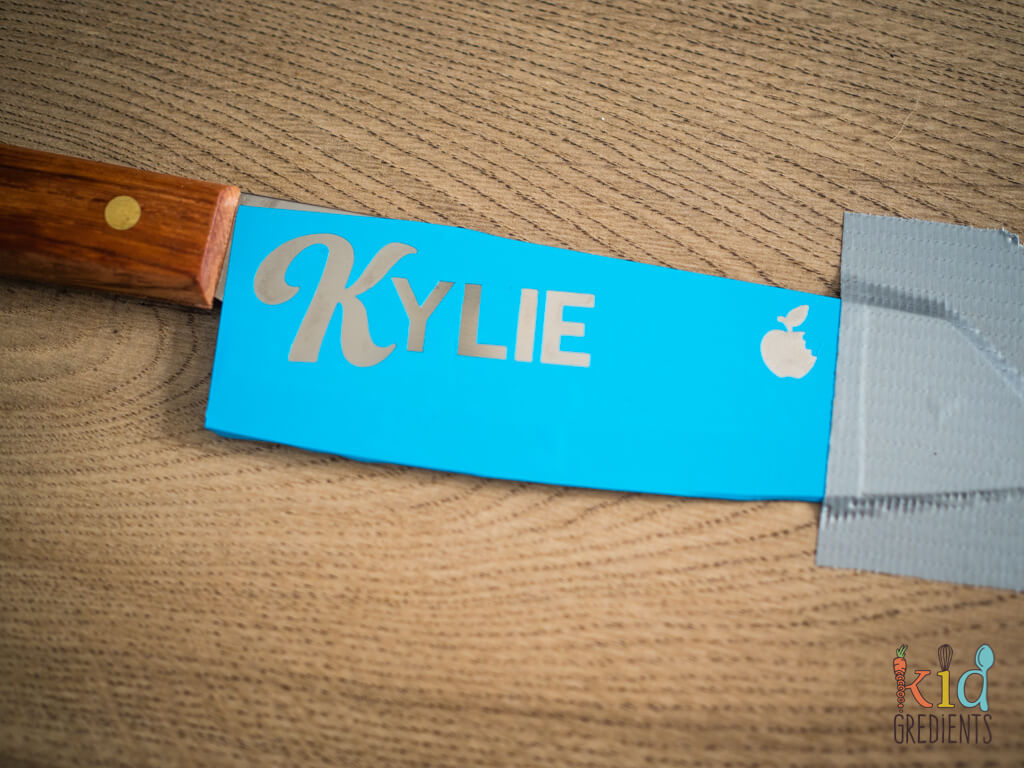
[mv_img id="16402"] - Stick the vinyl to the knife blade.
[mv_img id="16405"] - Seal the edges with duct tape leaving one bit bare for the alligator clips.
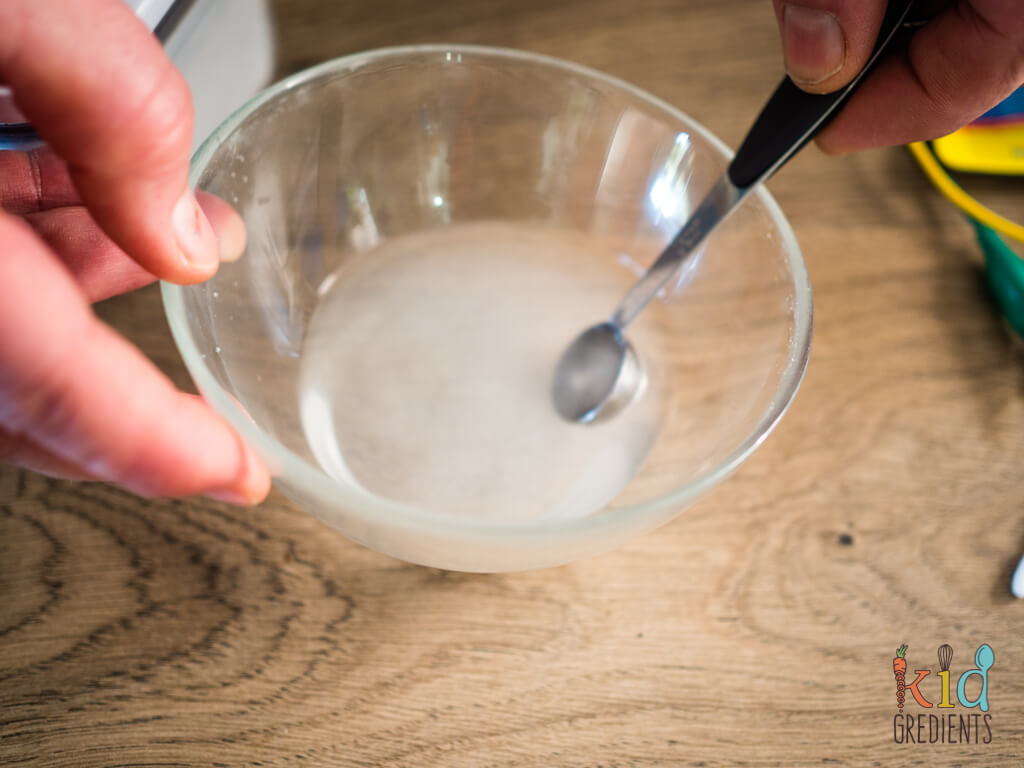
[mv_img id="16406"] - Mix a salt water solution ( ½ teaspoon salt to 1 tablespoon water).[mv_img id="16407"]
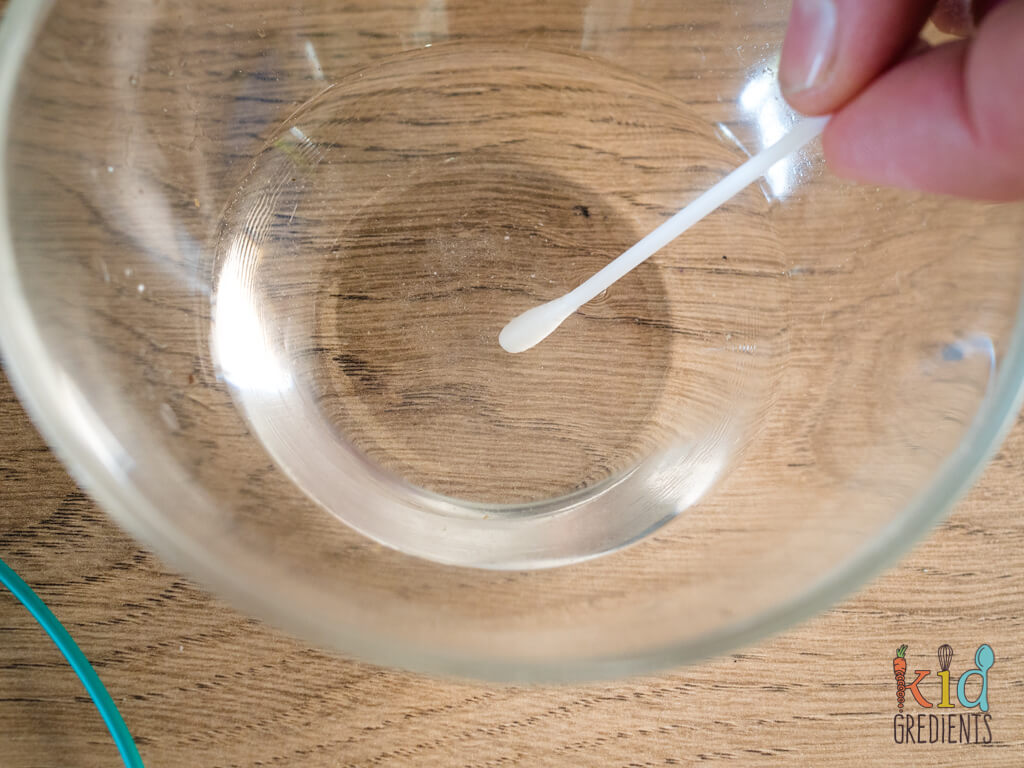
- Soak the cotton tip in the solution (you just want it wet not dripping)[mv_img id="16408"]
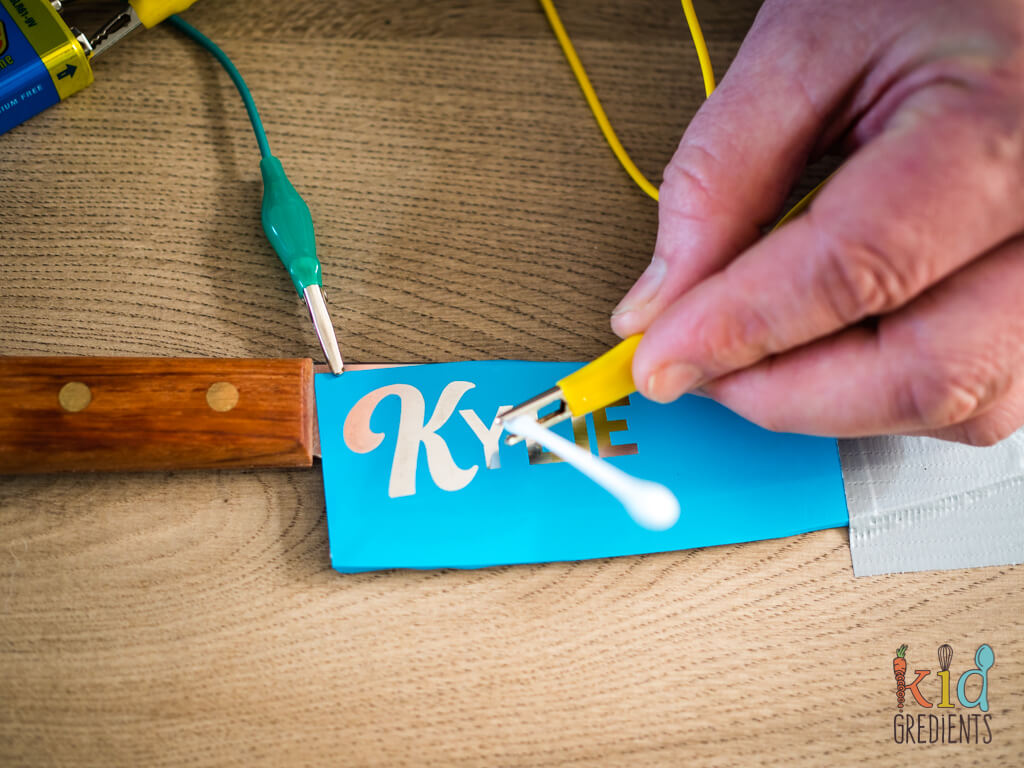
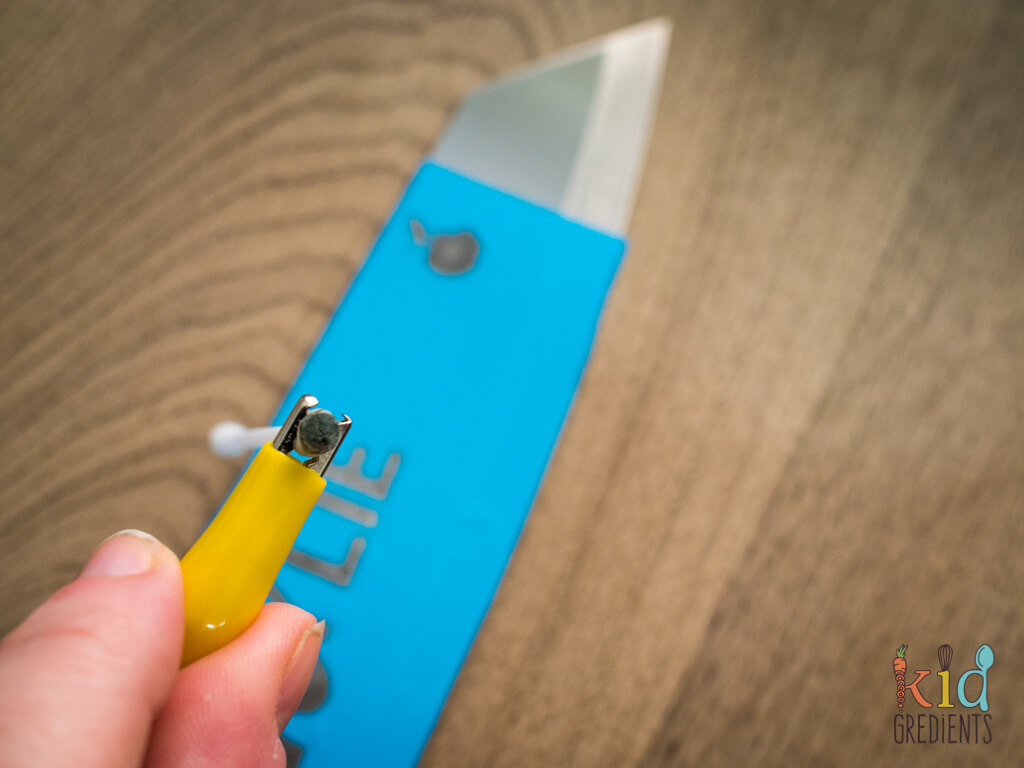
- Attach the alligator clips to the 9 volt battery. (negative clip attaches to the wet cotton tip and the positive goes to the knife)
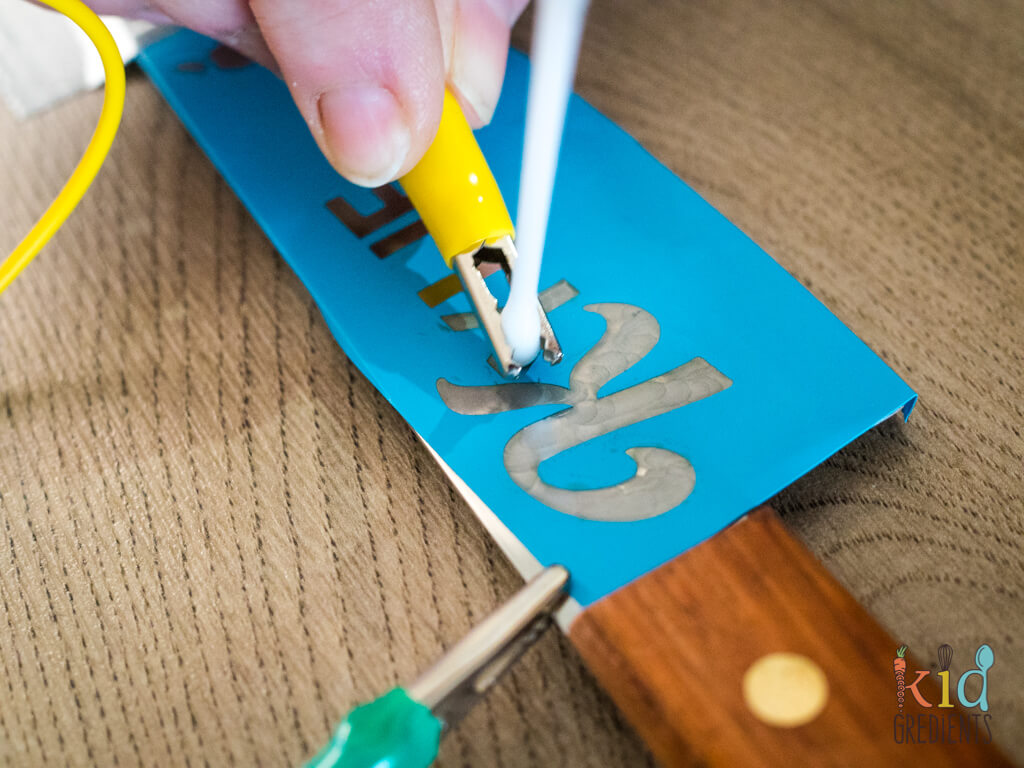
[mv_img id="16410"] - Etch your design on the knife. I found a dabbing motion to be good.
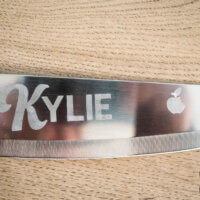
[mv_img id="16411"] - Go over the design again, until the desired darkness. The cotton tip will turn black, that's when you need to replace it!
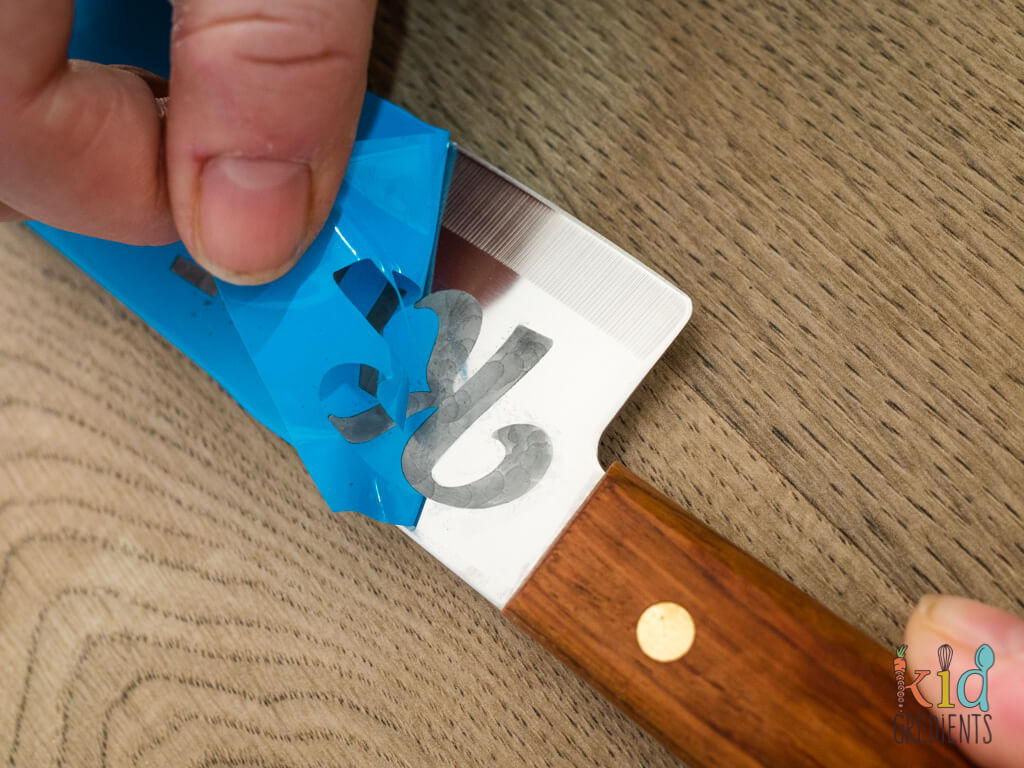
[mv_img id="16412"] - Remove the vinyl and duct tape.
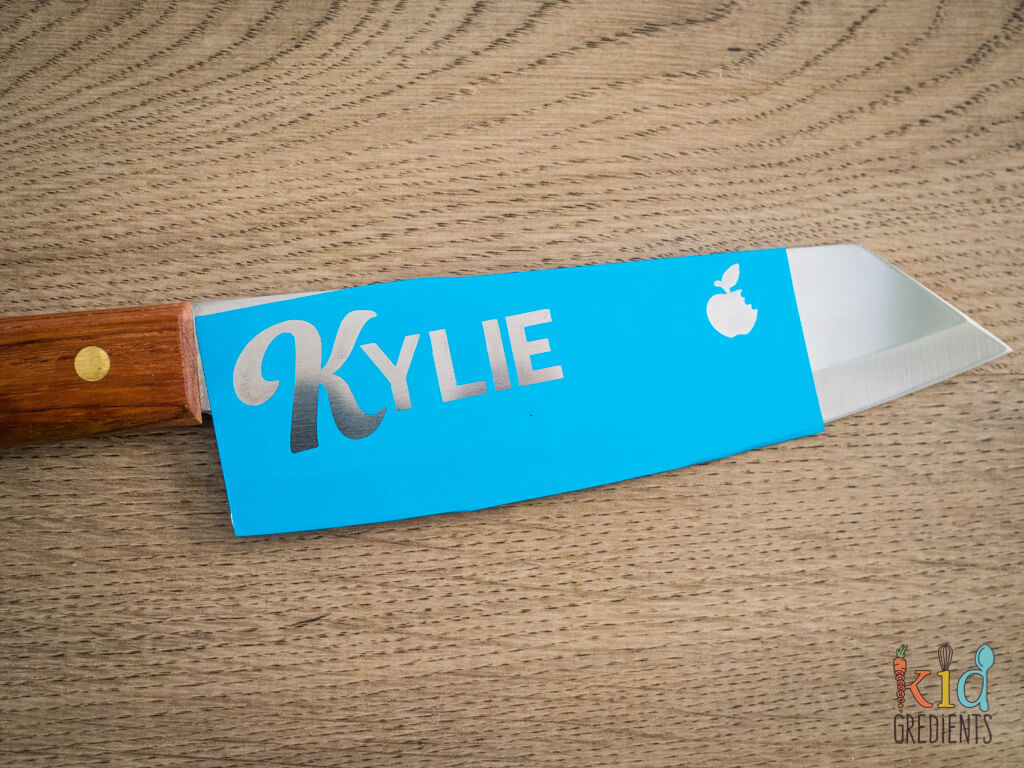
[mv_img id="16413"] - Rinse the knife, then polish the knife with a cloth.
Recipe video
How to etch a chef's knife
Equipment
Ingredients
- knife for etching stainless steel
- vinyl the size of the knife blade an offcut will do- doesn't have to be permanent vinyl
- duct tape
- cotton tips
- salt water solution ½ teaspoon salt per 1 tablespoon water
Instructions
- Make your design in design space.
[mv_img id="16401"] - Cut your vinyl using your standard Mat on your Cricut Maker.
[mv_img id="16404"] - Weed out the design elements using your weeding tool, and leave the background intact.
[mv_img id="16402"] - Stick the vinyl to the knife blade.
[mv_img id="16405"] - Seal the edges with duct tape leaving one bit bare for the alligator clips.
[mv_img id="16406"] - Mix a salt water solution ( ½ teaspoon salt to 1 tablespoon water).[mv_img id="16407"]
- Soak the cotton tip in the solution (you just want it wet not dripping)[mv_img id="16408"]
- Attach the alligator clips to the 9 volt battery. (negative clip attaches to the wet cotton tip and the positive goes to the knife)
[mv_img id="16410"] - Etch your design on the knife. I found a dabbing motion to be good.
[mv_img id="16411"] - Go over the design again, until the desired darkness. The cotton tip will turn black, that's when you need to replace it!
[mv_img id="16412"] - Remove the vinyl and duct tape.
[mv_img id="16413"] - Rinse the knife, then polish the knife with a cloth.
Richael Lawrence says
Would this work on regular stainless steel cutlery? Like for making children’s cutlery. Is the etching dishwasher safe?
Kylie says
Hi Richeal, yes it is dishwasher safe I have only tried it on these stainless knives.
Cut and Polish says
Hello. Many thanks 🙂 Great article